To place an image on a page, it must be uploaded to your Drupal Cloud site. The image you upload should be fully edited outside of Drupal. You could upload an image and resize it in Drupal to determine appropriate sizing but the final editing should be completed outside of Drupal in an image editing program. (Forcing an image to resize using the Drupal formatting tool can affect responsive design by causing images to scale incorrectly and distort.)
Important: When placing images or other media on your page, make sure the Text format selection (below the Body when you are editing a page) is set to Full HTML, not Filtered HTML or Plain text.
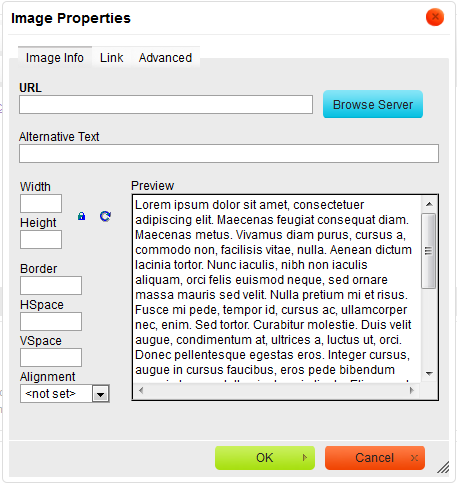
The image will be first inserted into “sample text” in the Image Properties window.
Click the Advanced tab if you want to add additional CSS style information for this image. Click OK whenever you’re ready. The image will be placed into your document body.
To upload an image:
- From the toolbar click the Image icon.
- Enter a url to point to an image on the web, or
- Click Browse Server to locate an image on your computer.

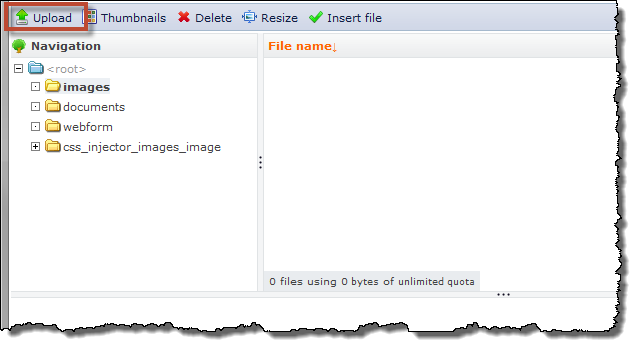
You are now at the Browse Server window. From here you can:
- Upload new images
- Delete unwanted images
- Select an image to insert into the document

4. Click Upload at the top left of the Browse Server window.
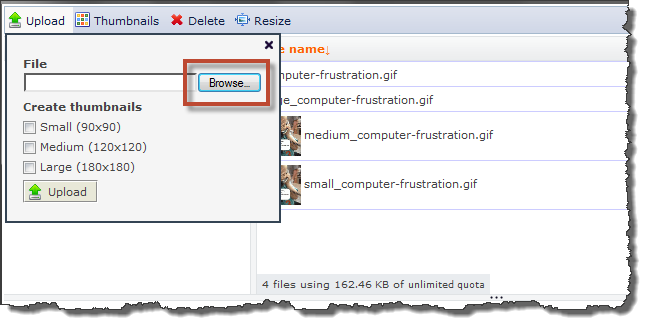
5. Click Browse
Navigate to your image file’s location on your computer, and open it. You can opt to create up to three thumbnails of different sizes in this same step.

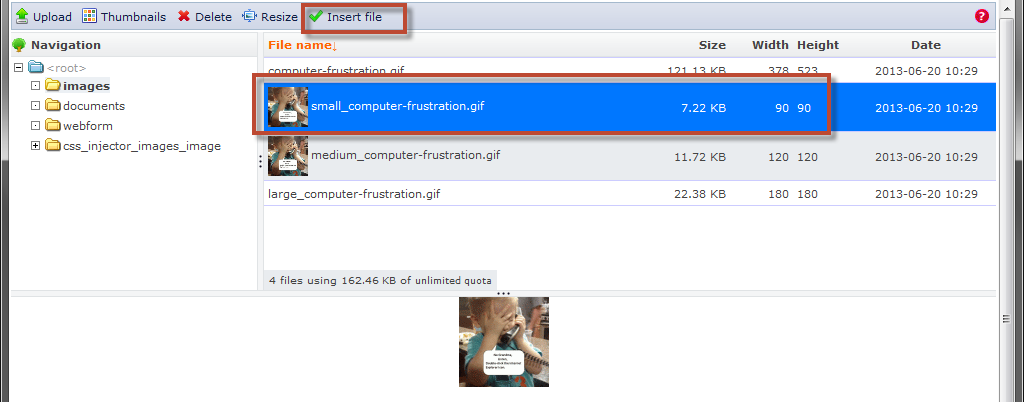
6. In the File Browser, select Image file to insert your image.
You may insert any image from the list into your document.

7. The image is displayed in a sample window with some options.
- You can add a border, horizontal space or vertical space around the image (measured in pixels). You can also choose the alignment of the image.
- To be sure the actual image size is being used, delete any height or width values in the boxes.

- To make the image a link click the Link tab and add the target url.
- To add CSS styles to the image click the Advanced link.
