Note: For the receipt page to work properly, you must first configure the Secure Acceptance settings in the Cybersource Business Center system to send data to your Drupal site.
Once you have verified that, return to your Drupal Cloud site and test your form.
- Click the View tab at the top right to switch to the webform entry screen.
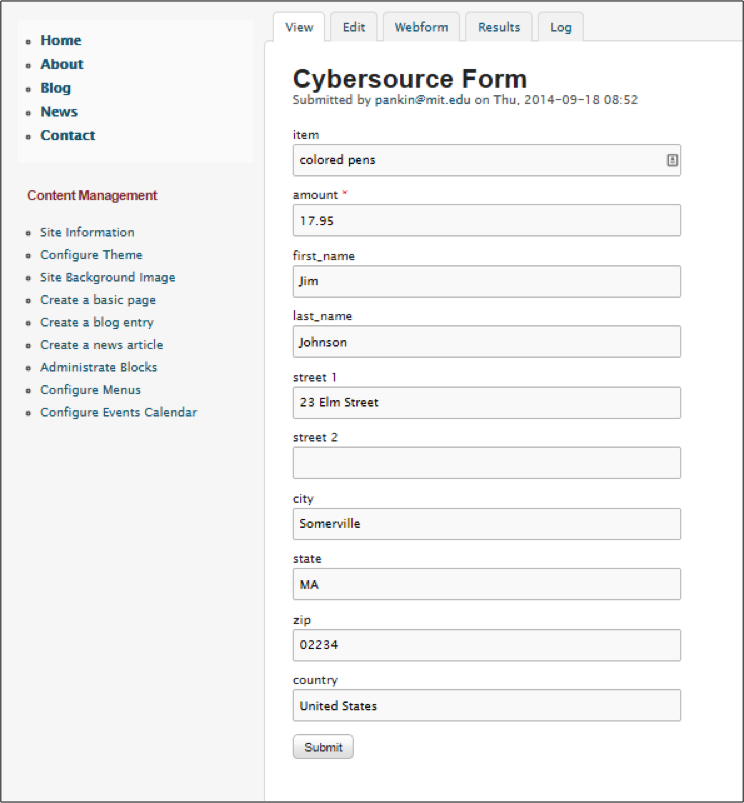
- Enter the billing information on the form and click the Submit button.
- Enter the Captcha words you see on your screen and click Submit button.
Note: this option may be disabled for some merchants.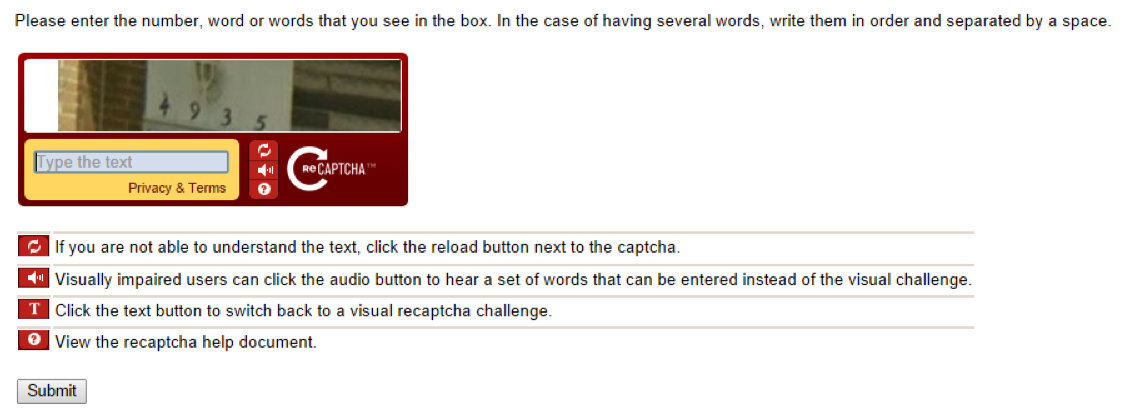
- You will be redirected to the Cybersource order page.
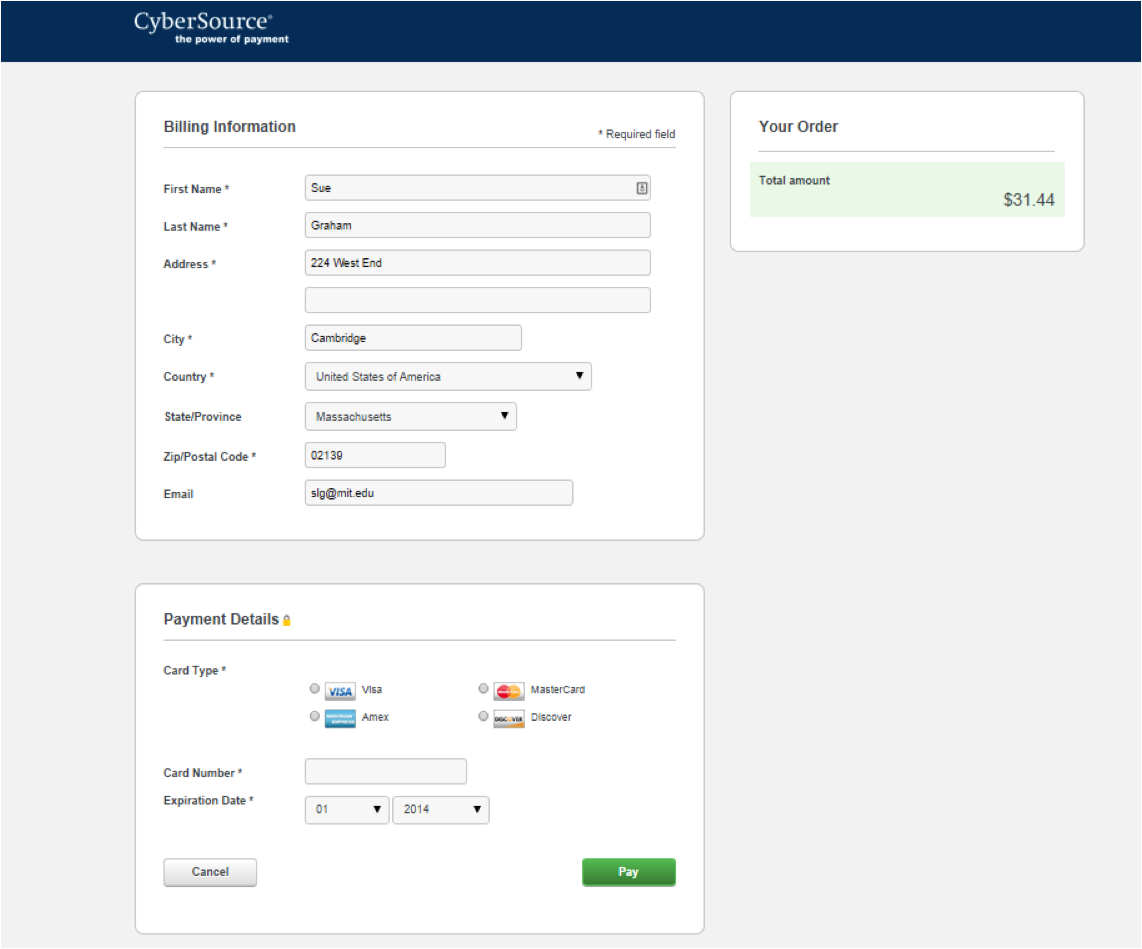
- Your billing information should already be populated from your webform.
- Enter your test credit card information.
- Credit Card Type: Visa
- Credit Card Number: 4111111111111111
- Card Verification Number: any 3 digits
- Card Expiration Date: any non-expired date
- Click the Submit button.
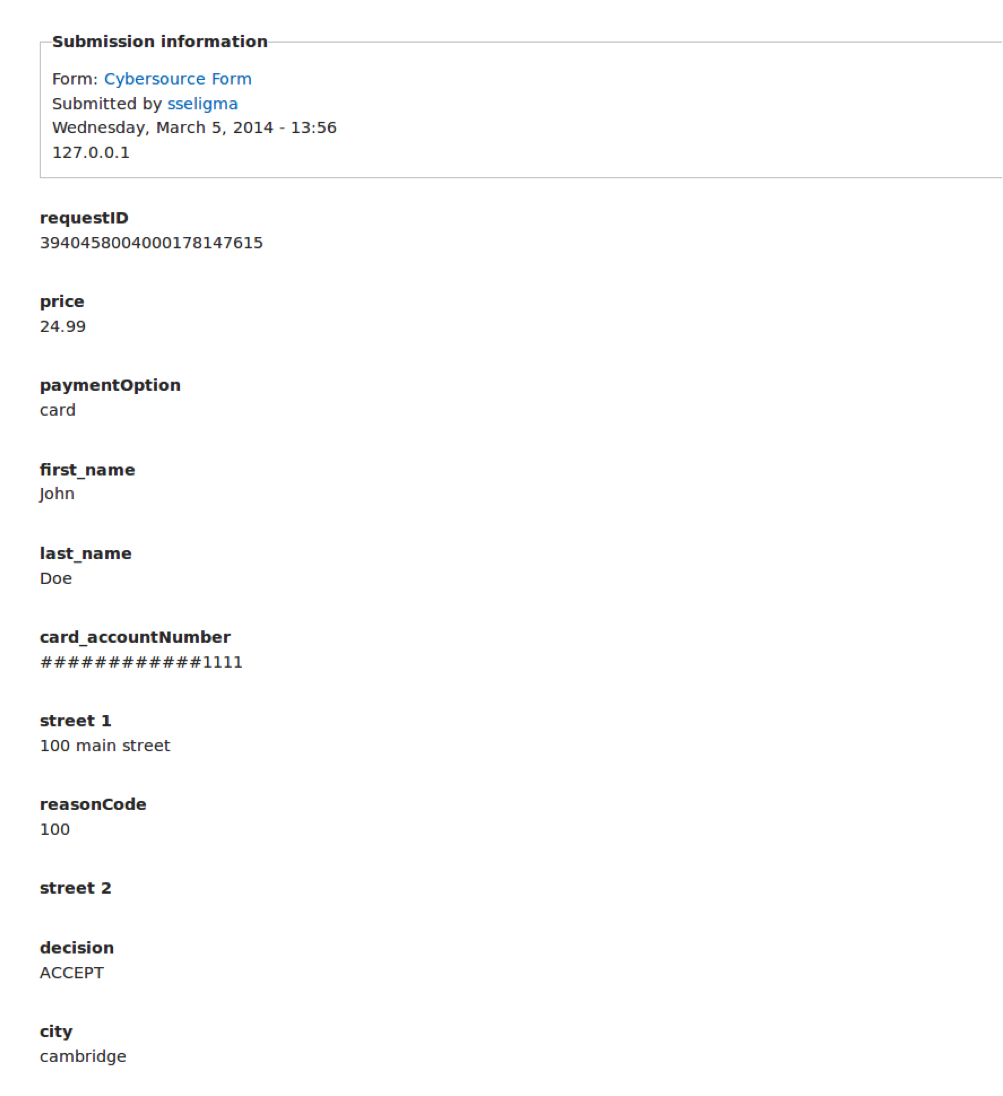
You are returned to your Drupal receipt page. If you used the custom receipt page in the example above, your receipt page will look something like this:
To view your transactions:
- From the administrator toolbar click Content, then click edit to the right of your Cybersource webform.
- Click the Results tab to view a list of your transactions.
- Click the View link to see the details for a transaction.