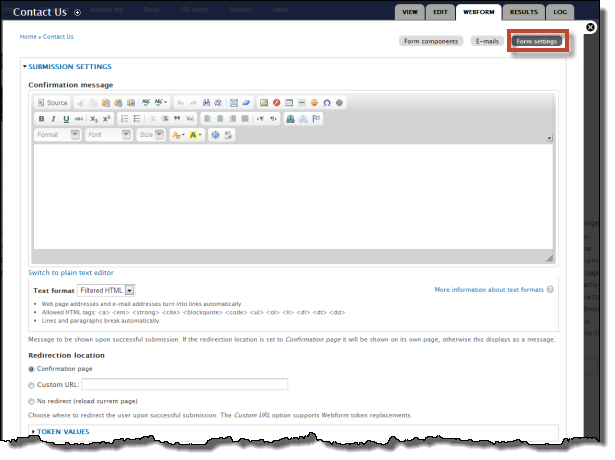
You can make several adjustments to how the form will operate from the Form settings overlay screen.

Add a confirmation message:
- Click WEBFORM, then Form settings.
- Use the edit box to create a custom Confirmation message. To learn more about editing see the FAQ section Make basic content changes.
- Add a redirect to Confirmation page (automatically created) to have this message appear on a new page instead of a display message. You may also create your own confirmation page and redirect to it.
- Click Save configuration when you are finished making changes.
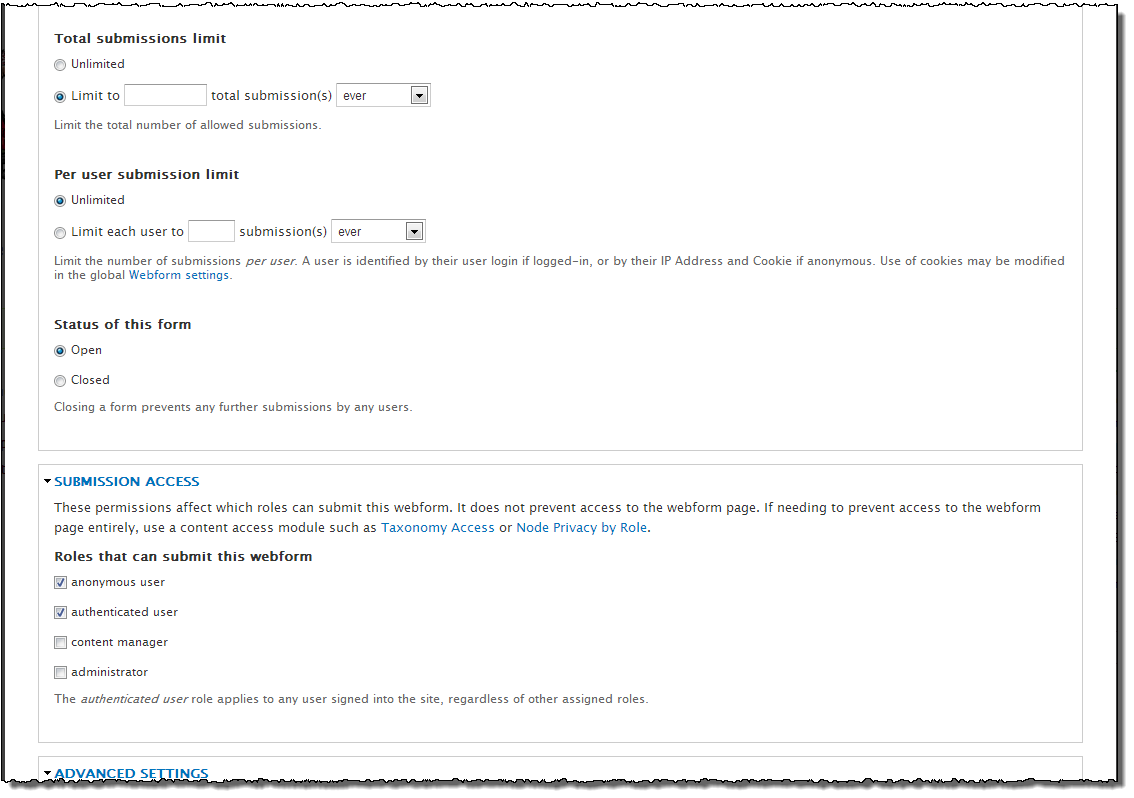
Set limits to form submission:
- Click Limit to and a number to limit Total submissions. You may limit within a time range as well.
- Click Limit to and a number to limit User submissions. You may limit within a time range as well.
- You can also click Closed to stop submissions completely. You can re-open submissions at any time.
- In the SUBMISSION ACCESS section, check the roles which you want to respond to the form, or uncheck the role(s) to prevent submission.
- Click Save configuration when you are finished making changes.
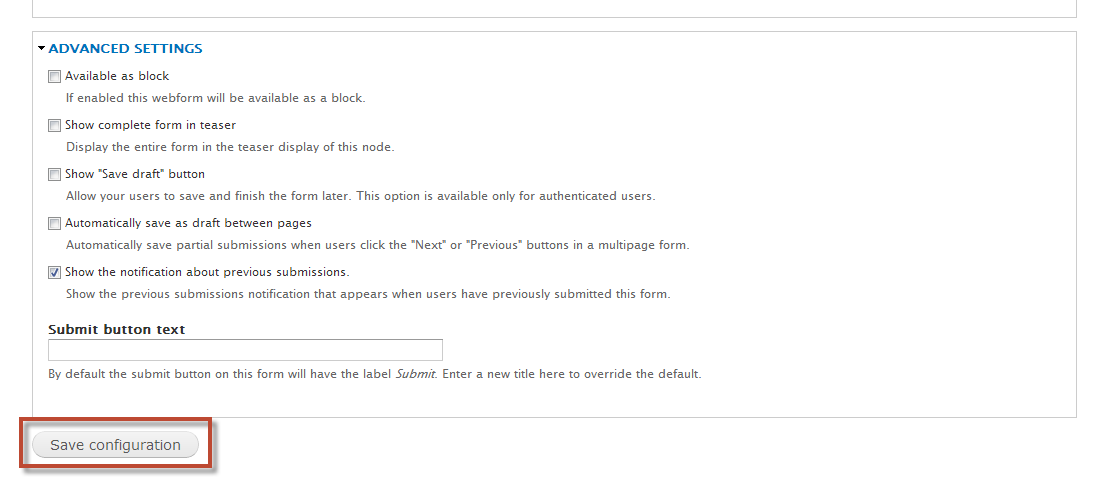
Set the text for submission button and other advanced settings:
- In the ADVANCED SETTINGS section, enter new text in the Submit button text box to override the default Submit text.
- Click Available as block to make your form available to be place on other pages (nodes) as a block. You would then access the form on the Block overlay page. See the FAQ Make changes and work with blocks.
- Click Save configuration when you are finished making changes.